
Click Category below to explore relevant FAQ’s
Basic Operation
Expiration dates in the BestCode Series 8 are called AutoCodes. Follow the video here to add either Realtime Codes or AutoCodes.

Watch this video on YouTube
Product Counter is in the Advanced Editing Menu. Follow the video instructions to see how to add a counter into your message
Watch this video on YouTube
This could be a couple of things.
1. Check the photocell to make sure that the light on the back of it is turning on and off as the product goes past. If you are using the Banner Proximity then the yellow power light should be on and the orange detect light should flash on and off as a product goes past. Watch the video below on how to afjust the photocell if thats not the case.
2. If you are running a variable speed shaft encoder, it could be that the encoder wheel has lost connection to the belt and is not rotating. The wheel needs to rotate at the speed of the belt to monitor the speed of the belt.
3. It could be that the Product Delay is set to early or too late and it is actually printing but off the product. Try holding a piece of paper in front of the head and give a print go manually using the button at the top of the Service Menu.

Watch this video on YouTube
First thing to do is to create the message you want to print. Insert any text and logos you need.
Once the message is created, while in the edit message screen click on the Advanced button and go to Print Mode. In the top left now you can select between Auto Select, Repeat print and Autoprint functions. Select Autoprint and set the Delay for the first print and the Pitch which sets up the space between the prints.
A tip on this, if you are not using a shaft encoder and the product is moving very slow you may need to increase the Width up to around 100 and the pitch up around 30,000 to get the spacing required.

Fault Code
This means you have added a bottle of Makeup without scanning the RFID tag in the label first. Follow the video below to see how to do that.

Watch this video on YouTube
General Maintenance
This is usually due to a misaligned ink stream or partially blocked nozzle. Follow the below steps.
With the ink stream off, clean the printhead components

Watch this video on YouTube
Start the jet back up and check for ink stream alignment


If the alignment doesn’t look like the above pictures then align the ink stream into the gutter
Watch this video on YouTube
This is due to something called ‘clipping’ and is caused by the ink stream not aligned properly in the gutter. The deflected dots for the top or the bottom of the code are printing but catching the edge of the gutter block.
Follow the Alignment video to fix this.

Watch this video on YouTube
Before cleaning the printhead please make sure you have the right cleaner. From the home screen of the printer click ‘Help’ and it will tell you the ink type that your printer is configured for.
Follow the Video Tutorial to see how to clean the printhead.
Watch this video on YouTube
This happens because the folder InstallBestcodeImage has been installed in a directory other than the root C:\
Check the location of this folder and if it is located anywhere other than C:\ then move the folder to the root directory so it is located at c:\InstallBestcodeImage\
Once this is done it should operate fine and the J-Link can be used to update firmware.
Make sure that the SmartFilter you are installing matches the Model of the printer you are installing it into. Some of the models are restricted to which filter you can fit. For Example, the Model 81 has its own 2,000 filter kit. Part# 31-5055-02 is specifically for the Model 81. If used in any other printer the tag will not work. Also, if another filter kit is installed in the Model 81 the tag will not work either.
Model 81 – 31-5055-02
Model 82 – 31-5053-02
Models 86/87 – 31-5051-02
Model 88 – 31-5050-02
Model 88 Opaque – 31-5054-02
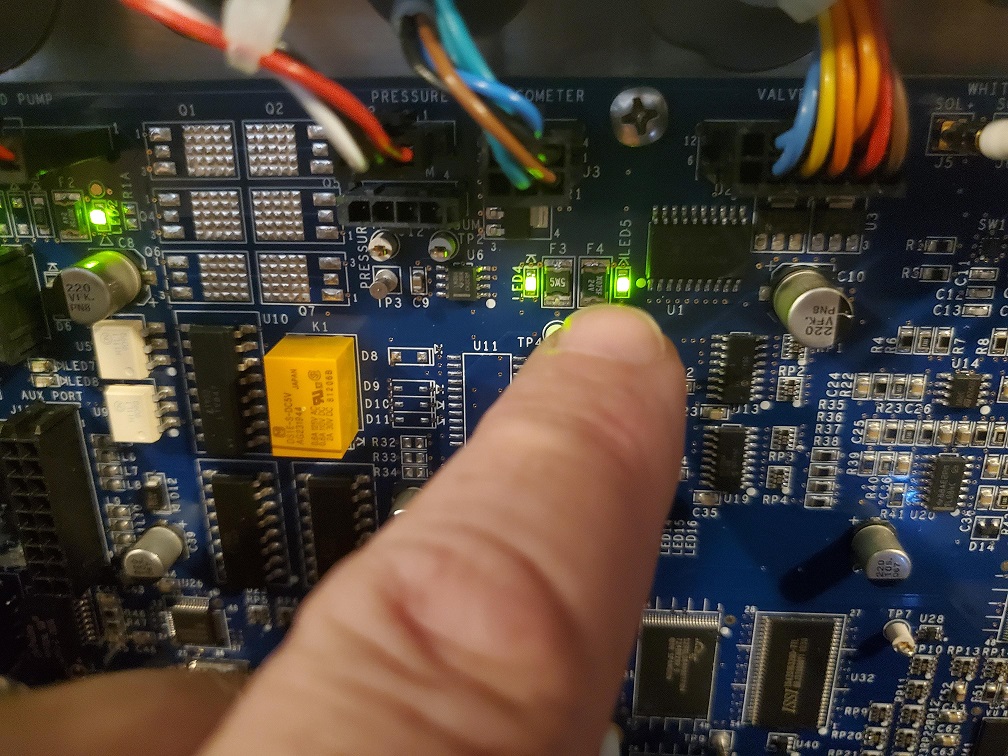
First thing to check is that the pump is getting 24V from the power supply. LED 5 on the CPU is an indicator that there is 24V available
If you have the 24V and the pump is not seized then it is either a faulty pump or most likely a bad cable or connection in the wiring harness for the pump.
If you hear a buzzing sound from the pump it has power but it is blocked with ink. You can try to flush the pump out but normally its not that successful.
So the main issue here is that someone has put too much ink into the printer. The ink tank itself will take one Quart bottle of ink. If you try adding more before the system asks for it you will overfill the tank.
There are float switches in the ink and makeup tank that measure the levels of ink and makeup. These readings can be seen on the front home screen.
It is possible that one of these switches breaks or gets stuck and will give a false reading so the operator may think they are doing the right thing by adding more ink.
Below are the different level status that you will see on the screen.
First check to make sure that the connectors from the float switches are plugged in and not loose or covered in ink.

This is normal operation where the ink has lifted the bottom float switch from the ink low position

This is also normal and showing an ink low status. The bottom and top float are at the low position. Here you would just add a bottle of ink once you have determined that the switches are working correct and not stuck.

This is a status that would not happen if everything was working properly. One of these float switches is stuck. Either the top float is stuck in the high position or the bottom float is stuck in the low position. Either clean for good operation or replace the float switch assembly.

The last one here is showing both switches held high which shows that the ink tank is over filled. This is the situation where you would probably see ink in the SmartFill cup fill tube or in the cup itself. You will probably also see ink leaking from the seal between the fill tube and the Ink tank.

This could be caused by a few things but most likely just a bad grounding between the head and the controller
- Check the connections on the blue coax cable that runs through the umbilical. It plugs into the Drop generator on one end and the bottom left of the CPU board on the other.
- Check continuity on the green ground cable that runs through the umbilical.
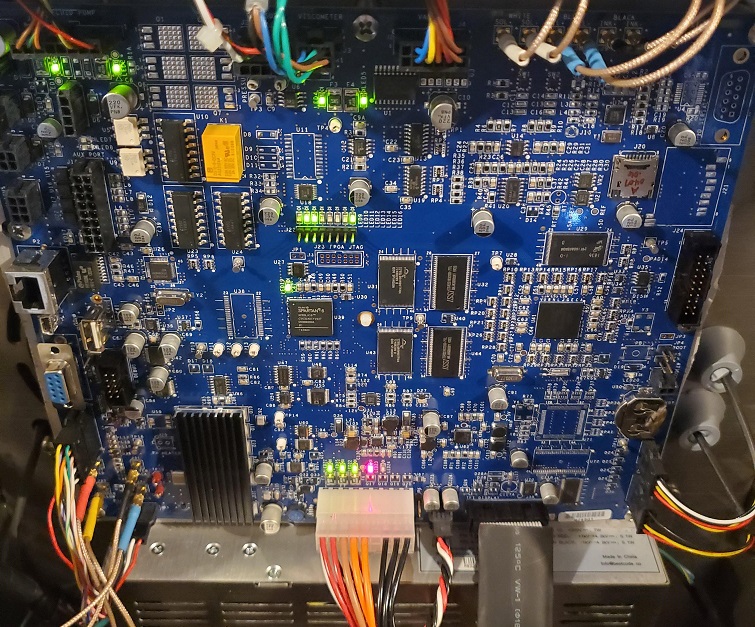
- Check on the CPU board for the two red LED’s LED 23 and LED 24 and make sure they are both on.

The fault could be any of the above and also the Drop Generator, PSU or the CPU board.